15 Automator and AppleScripts You Can’t Live Without
Computers were designed to do repetitive tasks efficiently and consistently, so why then are we still sitting around and renaming files on our computer by hand? Why are we still relying on our memory to remind us of our friend’s birthdays? There’s got to be a better way, and there is with Automator and AppleScript.
10. Import Finder Items into iTunes and Set Options
Intro to AppleScript
AppleScript is Apple’s consumer-level programming language that lets you write applications and scripts with English-like words and sentence structure.
AppleScript has been around for almost 20-years, allowing Apple’s customers to create their own programs, extend Mac OS, and create scripts that can do repetitious tasks. Because it is more advanced than Automator’s drag and drop user interface, AppleScript requires more practice and more knowledge of programming. However, AppleScript has a lot more power than Automator, making it still the go-to scripting language on the Mac.

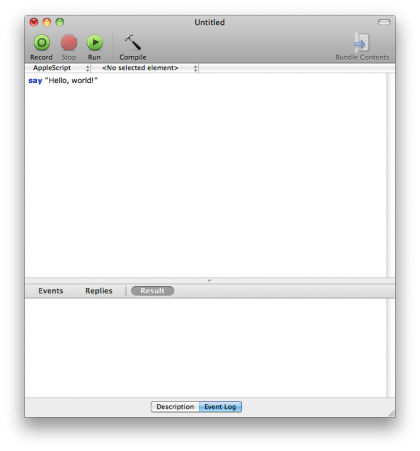
The AppleScript editor is nothing more than a text editor where you can type in your scripts.
To write AppleScripts, you will need to open the AppleScript Editor (located in /Applications/Utilities). This text-based editor is where you can type your AppleScripts as well as test and run them.
AppleScript really shines in its ability to save out the scripts as applications and run them on your Mac as completely stand-alone apps. Automator can do this, but unfortunately relies on the Automator engine in the background to carry out the tasks.

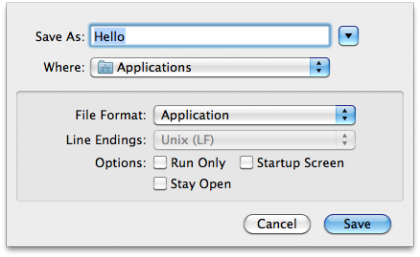
The save name is the name of the application, so name your applications accordingly.
To save an AppleScript as an application, go to File > Save As. In the resulting dialog, type in a save name, select a location, and select “Application” from the File Format drop-down menu. When you’re done, click Save and you will have your very own AppleScript application.
These are the basic features behind the AppleScript Editor that will get you up and running. You will use the things you learned here in building out the 5 AppleScripts below. Remember, if you get stuck, you can download the project files by clicking here. You can also copy and paste the AppleScripts below directly into the AppleScript Editor.
AppleScript Tutorials
1. Resize Images
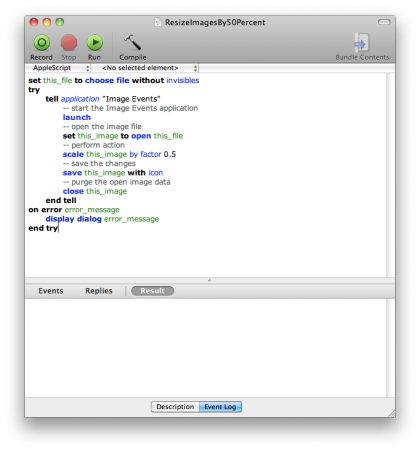
Today’s hi-resolution images look great on your screen, but when you want to e-mail them to someone, often times you must resize them so the pictures will fit inside of your e-mail send limit. Sure, you could break out a photo editing program, but the following AppleScript can automatically shrink any photo by 50%, saving you time and energy.

Sign up for breaking news, reviews, opinion, top tech deals, and more.